Hardware Components:
| 1. | USB B | x1 |
| 2. | R2012 4.7k | x1 |
| 3. | R0603 510R | x2 |
| 4. | R3116 1M | x1 |
| 5. | R1608 22 | x2 |
| 6. | R0603 10k | x1 |
| 7. | STM32F103C8T6 | x1 |
| 8. | R0603 100k | x2 |
| 9. | LED | x2 |
| 10. | Header 4 pins | x1 |
| 11. | Header 3×2 | x1 |
| 12. | Header 20 pins | x2 |
| 13. | C0805 1uF 105 | x1 |
| 14. | Linear Voltage Regulator | x1 |
| 15. | C0603 20pf | x4 |
| 16. | C0603 1uF 105 | x1 |
| 17. | C0805 10uF 106 | x1 |
| 18. | C0603 0.1uF 104 | x7 |
| 19. | Button | x1 |
| 20. | C0603 0.022uf 223 | x1 |
| 21. | Crystal 32kHz | x1 |
| 22. | Crystal 8MHz | x1 |
Software Tools:
- Inventhub
- Altium Designer
Introduction to STM32 Board:
STM32 is a high-performance, development board with loads of features in a small form factor. It features a 32-bit ARM Cortex M3 processor running at 72MHz frequency with 64Kbytes of flash memory and 20 Kbytes of SRAM. It has an extensive range of I/O and peripherals, including multi-channel Direct Memory Access, several high-resolution ADC, and three general-purpose 16-bit timers plus one PWM timer. It also has multiple communication interfaces including two I2Cs and SPIs, three UARTs, and USB. Further, it allows you to add additional flash by soldering an SPI Flash to the board.
This development board is pre-flashed with an Arduino bootloader, so you can download the sketch just like any other Arduino board. The STM32 can be programmed using either the Type-C USB connector (if the bootloader is flashed), the STLink USB dongle, or an external USB to 3.3V TTL adapter.
Features:
- On-board Mini USB interface, you can give the board power supply and USB communication
- On-board test indicator LED
- On-board reset button and power indicator LED
- On-board 100ma 3.3V Regulator
- All GPIO are led out and the names of the pins are marked
- After soldering the headers, you can directly plug the board onto the breadboard
Technical Specifications:
- CPU Part Number: STM32F103C8T6
- Core: ARM 32 Cortex-M3 CPU.
- Debug mode: SWD (can be programmed with ST-LINK V2)
- CPU Internal Maximum Clock: 72MHz
Schematic:
For the design implementation, I have decided to work on Altium which is very useful and efficient for complex designs. After creating my schematic I have uploaded my schematic file online on Inventhub for the users. Anyone who wants to implement my design can visually view or download the file from Inventhub and can implement my design.

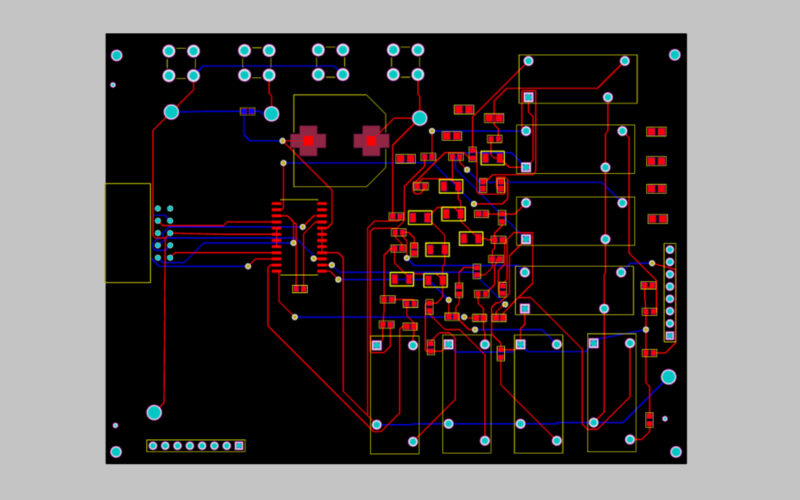
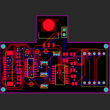
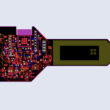
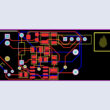
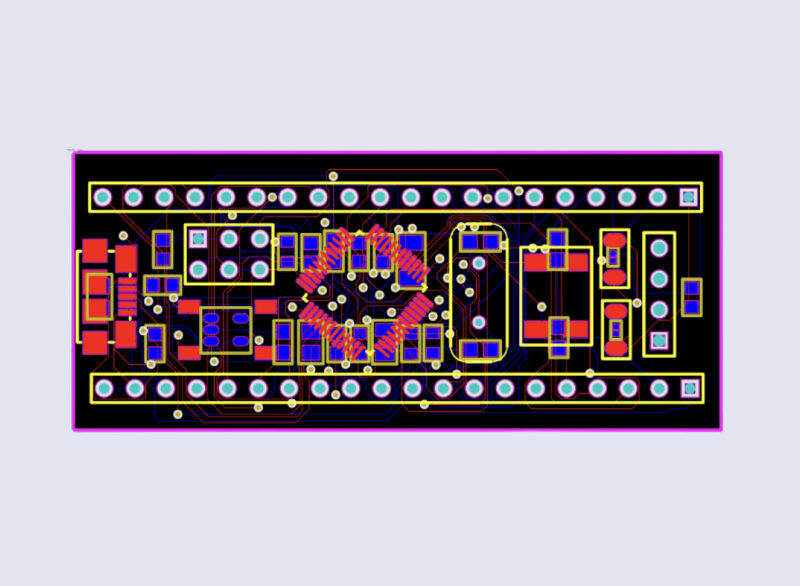
PCB:
I have implemented the PCB design of this board on Altium. It is a double layer PCB board one is the top layer and the other is the bottom layer. There is a silkscreen layer on both sides where I have written the text on my board. Autoroute in Altium allows us to route automatically but this design and its routing are quite complex so I did it carefully part by part. After completing the routing I can view the board in 2D or 3D to get an idea of how it will look after fabrication.
Once I have done designing my board I have uploaded the PCB design file online on Inventhub. The manufacturer can view or download my PCB design file to fabricate my board without any error.

Bill of Materials:
After the fabrication of the board, I created a list of components on Inventhub which contains the details of the manufacturer, supplier, manufacturer part number, pricing, and quantity. By just putting these details in the BOM file on Inventhub, I can easily calculate the total cost of my project automatically using the supply chain option. I can also view the datasheet of the component and can view its 3D model. Instead of visiting the component provider, I can send him this BOM file, he can download it in CSV file format and can deliver my components as per my design requirements.
Install STM32 to Arduino:
- In Arduino, go to File → Preferences
- Add the URL below to ”Additional Board Manager URLs” box then click ok
<https://github.com/stm32duino/BoardManagerFiles/raw/master/STM32/package_stm_index.json>
- Click on “Tools” menu and then “Boards → Boards Manager”
- Select the “STM32” and click on install.
- You can check the STM32 board from the main menu
- Select the “Generic STM32F1 series”
- You can also select the part number of the board from the “board part number: BluePill F103C8” option
- Select the available port in your Arduino. Now you are ready to start with you STM32 board
Applications:
It can be interfaced with all kinds of electronic components including;
- Sensors
- Displays
- Cameras
- Motors
To get complete how-to and detailed information on the project design and implementation visit this link: