Hardware Components:
| 1. | Resistor 560k | x9 |
| 2. | Resistor 470 | x7 |
| 3. | Resistor 33k | x4 |
| 4. | LM7805 | x1 |
| 5. | Resistor 12k | x4 |
| 6. | Header PINS 2 | x1 |
| 7. | Header Pins 10 | x1 |
| 8. | CD74HC147MT | x1 |
| 9. | CD4511BNSR | x1 |
| 10. | BC547B | x4 |
| 11. | 7-segment | x1 |
Software Tools:
- Altium Designer
- Inventhub
The water level indicator is used to indicate the level of water or any fluid to control the overflow. This PCB device can be used within containers or water tanks. Using this device we can save water for generations. We can also use it as safety equipment in swimming pools for kids to avoid an increase of water above a certain limit. This is a digital water level indicator in which a seven-segment LED display will show the level of the water in terms of numbers ranging from 0 to 9. This device is also useful for irrigation purposes.
Working:
This device consists of three major components; IC74174 and IC4511, a 7-segment display. The IC74147 has nine dynamic low input sources and changes over the dynamic contribution to dynamic low BCD yield output. There is 10 pins connector header attached on this board, this header is indicating some levels; pin1 indicates L9, pin2 indicates, L8, and so on till pin9 indicates L1. When the water tank is empty, all the inputs of IC74174 are high. Output also remains high, making all the inputs of IC4511 low. The 7-segment display shows 0, which means the water tank is empty. When the level of the water arrives at the L1 position, the 7-segment shows 1, and when the level of the water arrives at the L2 position, the displa7-segment shows 2. When the tank is full, all the inputs of IC74174 become low making IC4511 high. The 7-segment display shows 9, which means the water tank is full.
Design files:
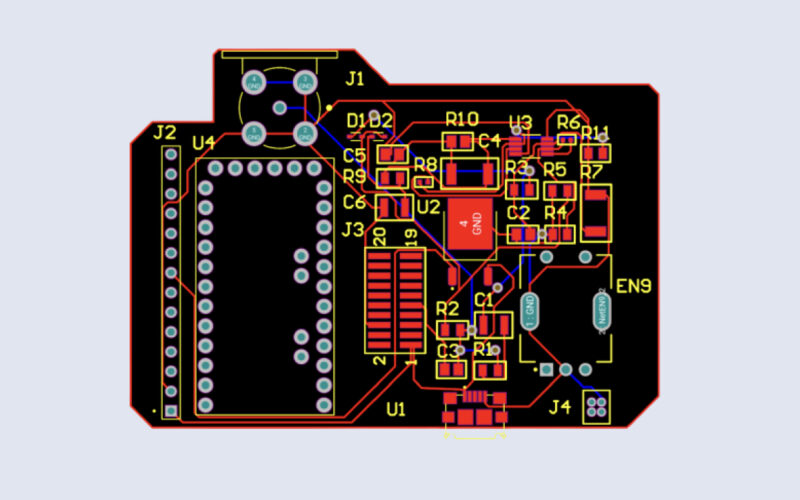
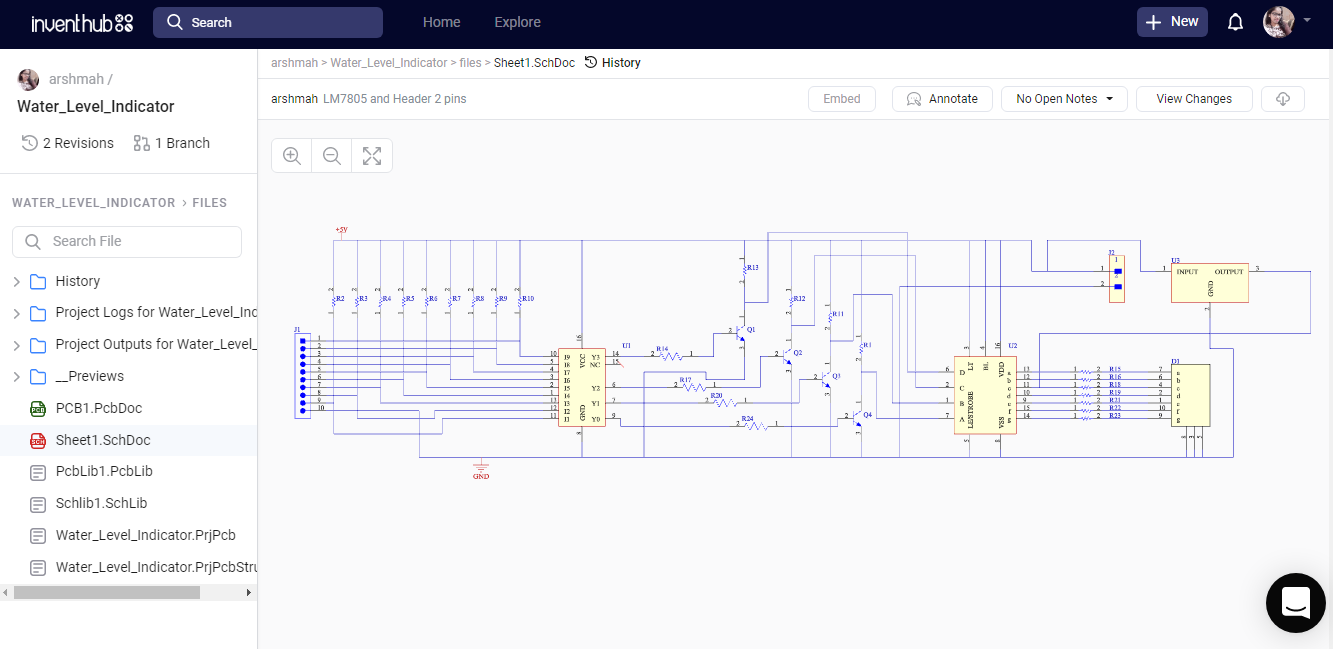
I have designed a schematic diagram on Altium Designer. Then I created an empty project online on Inventhub and uploaded my schematic file there. Making project online is helpful for the users who want to implement my design. They can visually view and download it from the Inventhub easily and can directly implement the design without any error.
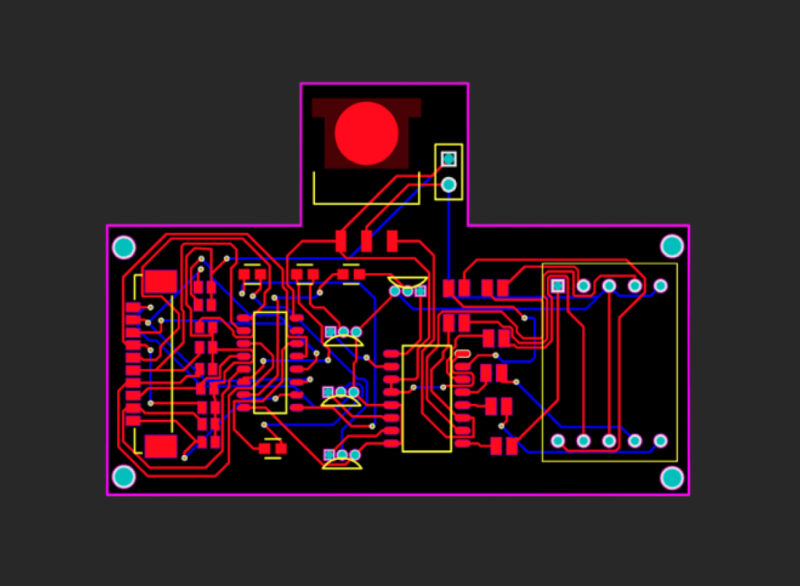
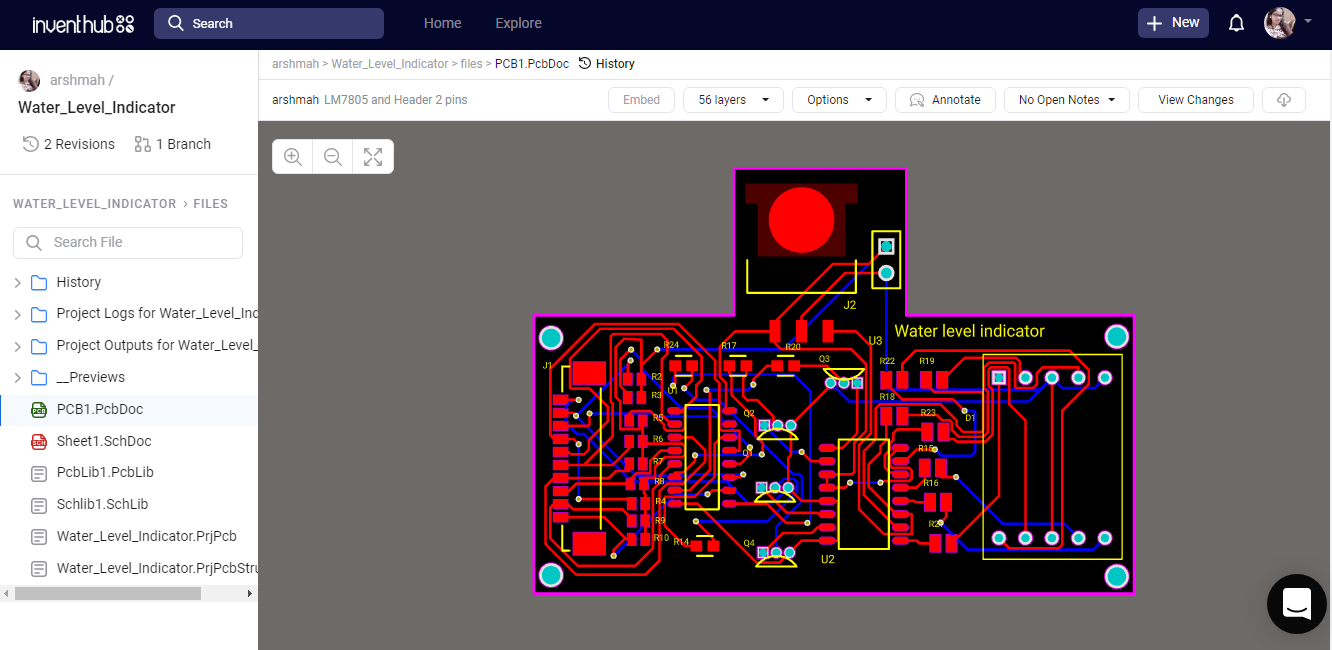
I have converted my schematic file to the PCB file. Here I can view my board in 3D, check for errors, and edit the shape of the board. I have uploaded my PCB file on Inventhub. Instead of visiting the manufacturer, I can send him the PCB file. This is also useful for the users who want to design my board, they can view and download it from the Inventhub. I can also enable or disable the layers of the board to focus on a specific layer.
For fabrication, I have uploaded a release file of my project in a ZIP file format which contains all my design files. Instead of visiting the manufacturer, I can send him this release file and he can fabricate my board without any error.
Project History:
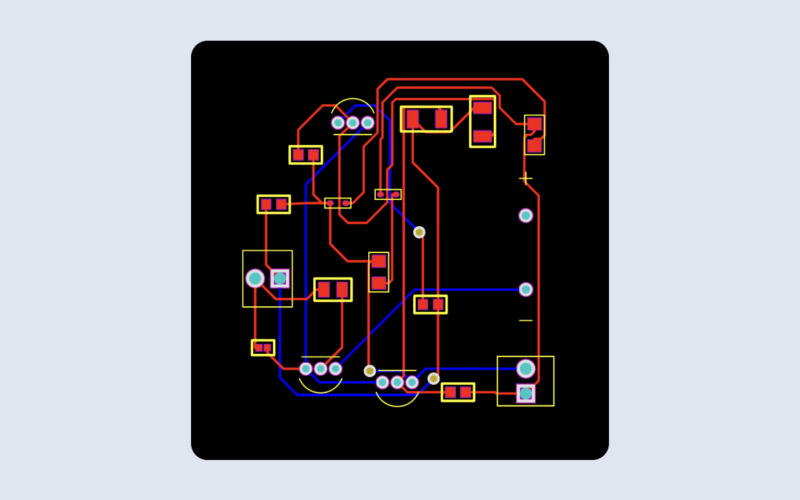
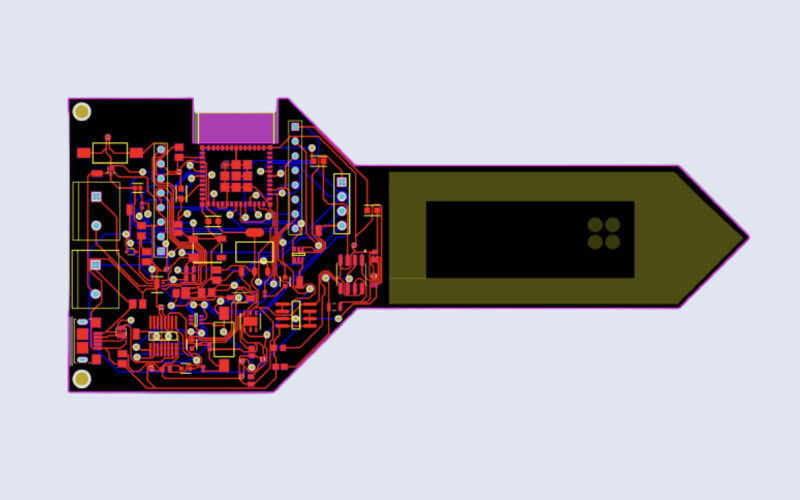
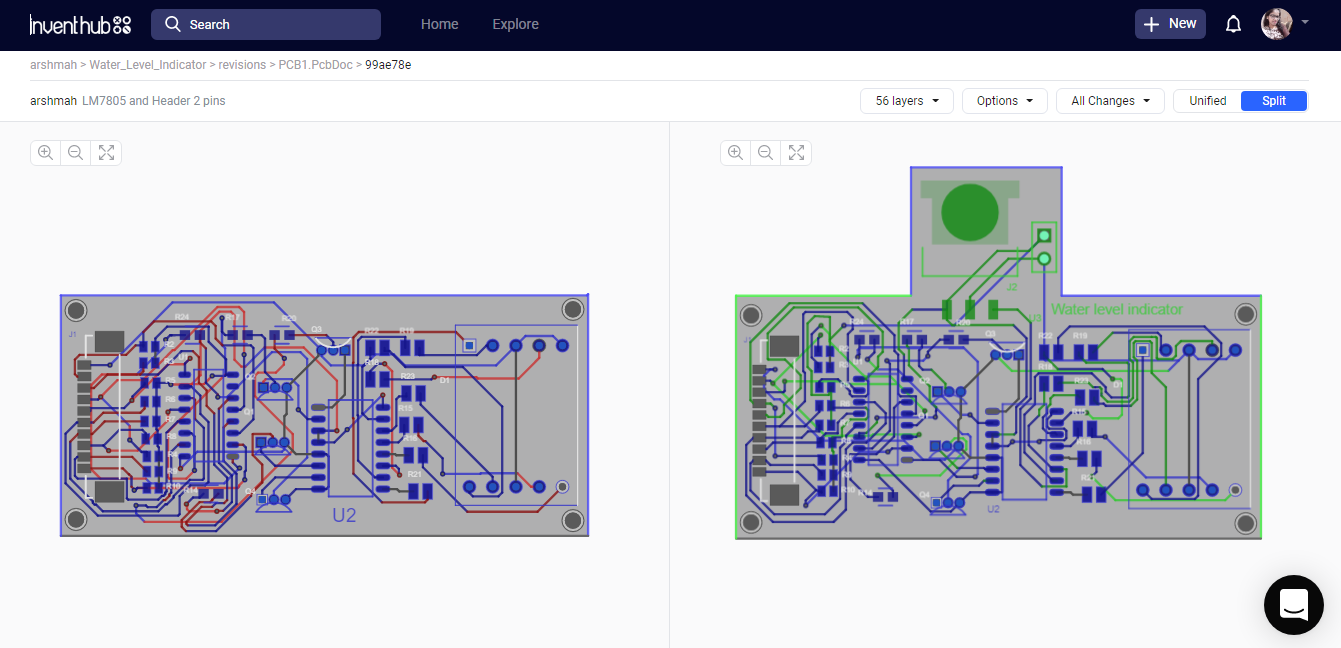
Project revisions allow users to view their previous or current changes in the design they could be added, deleted, or modified parts of the schematic or PCB file. I have uploaded revisions of my design online on Inventhub to keep the backup. If I want to get any previous change I have made in my design, I can go to the revision, select that particular file, and can download it as my current design.
The below figures show two different designs representing the previous revision on the left side and the current or final revision on the right side. You can see the difference in the design between the first and the final revision.
BOM file:
I have created a bill of materials that contains the details of my components. To embed components on the board, I can send this file in CSV format to my component provider. He can deliver the components easily as per design requirements. I can calculate the total cost of my project by clicking on ‘Supply Chain’. My total cost for this project as per the choice of my supplier, manufacturer, and availability of the component is $13.640.
Uses:
- Useful to make an alert in any Tsunami warning
- Irrigation water control
- Control level of water in Sewage pumps, water tanks, oil tanks, pools
- Turn on or off pumps by indicating the level of water
To get complete how-to and detailed information on the project design and implementation visit this link: