
A microcontroller with more I/O pins and extensive features best to use in hobbyist projects.
Hardware Components:
| 1. | Resistor 22kohm | x1 |
| 2. | Switch Button | x1 |
| 3. | Resistor 560 ohm | x1 |
| 4. | Resistor 4.7kohm | x1 |
| 5. | Resistor 100 ohm | x1 |
| 6. | Resistor 10kohm | x1 |
| 7. | Schottky Diode | x1 |
| 8. | LM7805CT | x1 |
| 9. | HDR 33 | x1 |
| 10. | POWER JACK | x1 |
| 11. | Green LED | x1 |
| 12. | EG1218 | x1 |
| 13. | PIC18F45K22-I_PT | x1 |
| 14. | HDR 2 | x2 |
| 15. | Capacitor 0.33uF | x1 |
| 16. | Capacitor 1000uF | x1 |
| 17. | Crystal 10MHz | x1 |
| 18. | Capacitor 10uF | x1 |
| 19. | CONN JACK | x1 |
| 20. | Capacitor 0.1uF | x2 |
Software Tools:
- Inventhub
- Altium Designer
Microcontroller PICAXE40X2:
The PICAXE40X2 is a microcontroller based on Microchip PIC (Programmable Integrated Circuit) MCUs. They can be programmed easily on a computer or via USB cable without the need for a conventional programmer. They have more I/O or digital pins than the Arduino MCU that’s why they are more powerful, having more memory, easy to use PICAXE software and low cost microcontrollers. They are used in various electronics devices and gadgets like toys, DVD player, TV, microwave oven, washing machine and dryer.
For instance, In microwave oven, the microcontroller processes your input that you enter through keypad, displays information as an output, handle the time for cooking, and the bell rings when your food is ready.
These MCUs are also popular among students to design their educational projects. They are available in 33 pins TQFP packages.
Features and Specifications:
- It can support 33 pins for I/O purpose
- Analogue pins are 27 including sensor pins
- Internal oscillator has a frequency of up to 64MHz using external resonator
- The PICAXE40X2 has a program memory capacity of 4096bytes
- Its RAM capacity is 1280bytes
- This MCU has 4 internal and up to 32 external program slots
- It has a feature of acting as an I2C slave device
- In order to drive this microcontroller, 3V to 5V DC supply is required

Schematic file:
I have designed schematic diagram on Altium Designer. I have created an empty project online on Inventhub and uploaded my schematic file there. Making project online is helpful for the users who wants to implement my design. They can visually view and download it from the Inventhub easily and can directly implement the design without any error. I can also add multiple files like PCB file, BOM document file, and library files by clicking on the ‘Add file’ button.


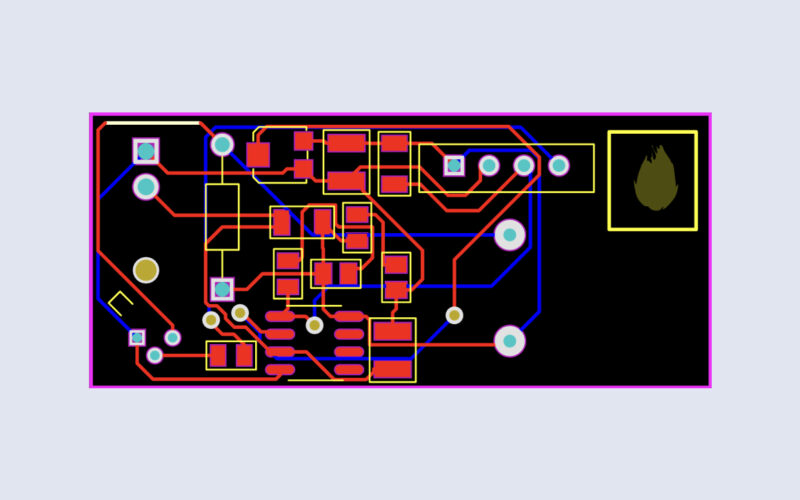
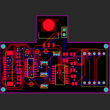
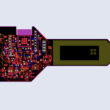
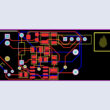
PCB:
For the fabrication, I have converted my schematic file to the PCB file. Here I can view my board in 3D, checks for the errors and edit a shape of the board. I have uploaded my PCB file on Inventhub. Instead of visiting the manufacturer, I can send him the PCB file, he can easily download it and can fabricate my board. This is also useful for the users who wants to design my board, they can view and download it from the Inventhub.

Project History:
To keep the backup of the design files online, I have pushed all the changes on Inventhub I have made in my design. If I want to get back a previous change of my design and want to use it as my current design I can easily go to the revisions section and download the specific file. Each version has a specific name for better understanding of a user.

Below figures shows the addition of a connector header of 33 pins and a PICAXE40X2 microcontroller.


Release file:
To get my whole project at one place, I have created a release file of my project after uploading all my design files on Inventhub. This file contains my schematic, PCB, library and all history files in a ZIP file format. The manufacturer, instead of viewing and downloading each file one by one, he just needs to download this release file and he can easily fabricate my PCB without making any error.

Bill of Materials:
My bill of materials contains the list of my components with all necessary details like manufacturer, supplier, part number, quantity, price, and dimensions. I have created a BOM file in Altium then I have uploaded it in CSV format on Inventhub where I can calculate the total cost of my design by selecting the ‘supply chain’ option. I can view the components and can read their datasheets also. I can select my distributor for the components depending on the price and availability of the components. Our total cost is $18.662. My component provider can easily download this BOM file and can deliver my components as per my design requirements.